Media
Within the “Media” tab, all media that has ever been uploaded to the platform is listed and sorted by “Created at” by default.
Media index
The table contains the following item information:
- Type: “Type” displays the media type of each item (video, audio, image or document).
- Subtype: Media types can contain subtypes, like e.g. “YouTube” or “Vimeo” for videos.
- Thumbnail: The thumbnail of the medium. A click on it leads to the medium detail page.
- Title: “Title” displays the title of the medium.
- Users: “Users” displays the user who has uploaded the medium. By clicking on the user’s name the user information page opens.
- Client (VIMP Enterprise and Campus only): Name of the client to which the medium belongs (requires multi-client license key).
- Views: The number of media views.
- Comments: The number of comments which have been added to a medium.
- Messages: Number of messages sent with the “Report medium” function of the frontend.
- Downloads: Number of media downloads.
- Featured: Indicates, if the medium is marked as “featured”.
- Public: Indicates, if the visibility of the medium is ”public”, “private” or “hidden”.
- Combined file size: Specifies the file sizes of the medium.
- Approval comment: Approval comment(s). Requires the workflow module to be enabled.
- Uploaded at: “Uploaded at” displays the date when the medium was last uploaded.
- Created at: “Created at” displays the date when the medium was uploaded initially.
- Status: The status of the media (uploaded, converting, error, verify, illegal, legal, blocked, deleted, recode).
By moving the mouse over the “Options” link of a medium in the media index a media context sub menu appears:
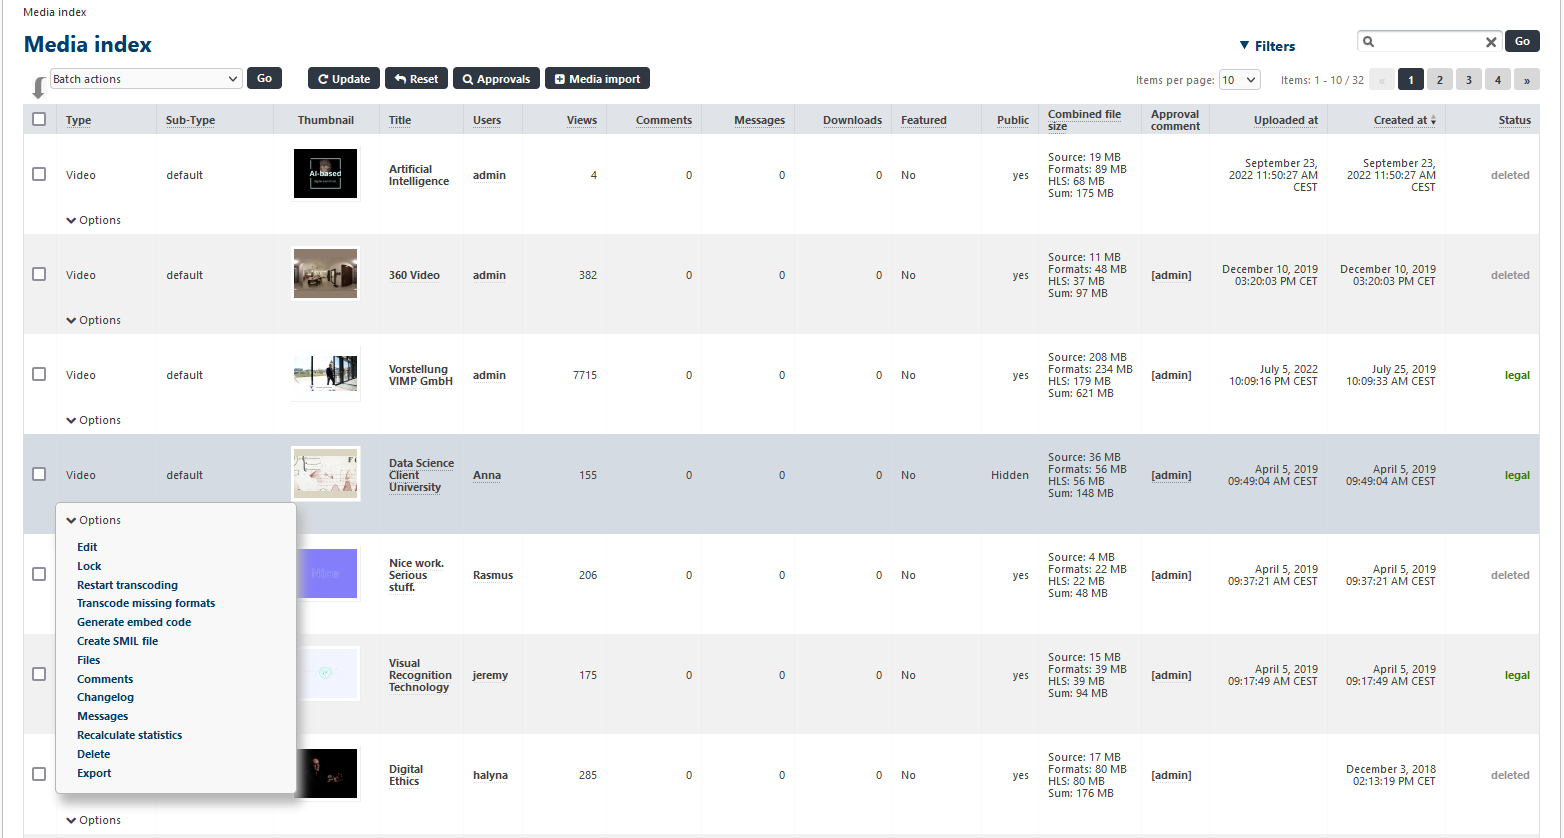
- Edit: Clicking on “Edit” opens the “Edit medium” page, where the medium meta data can be modified.
- Copy (not available in VIMP Light): Clicking on “Copy” opens the “Copy medium” form und duplicates the medium.
- Status change: Depending on the current status of the medium the status can be changed (e.g. “Lock”).
- Restart transcoding: Clicking “Restart transcoding” repeats the transcoding process for this medium into all defined formats.
- Transcode missing formats: Clicking “Transcode new formats” only transcodes the additional formats, e.g. if you added a new one.
- Generate embed code: Allows you to create the code for embedding VIMP media into other web pages.
- Export to YouTube (not available in VIMP Light): Opens the export to YouTube form and exports the medium to a YouTube channel.
- Create SMIL file: Manually creates the necessary SMIL file for ABR streaming.
- Files: Opens the list of transcoded files.
- Restore version (not available in VIMP Light): Opens the restore media form and enables you to roll the medium data record back to a previous version.
- Comments: Opens the list of comments of the according medium.
- Changelog: Opens the changelog of the according medium.
- Messages: Opens the list of messages of the according medium.
- Recalculate statistics: Clicking “Recalculate statistics” updates the usage statistics of the selected medium.
- Delete / Purge: Clicking “Delete” marks the medium as deleted. Actually, the medium remains on the server and can still be viewed in the admin panel, but is no longer accessible within the frontend. After a medium has been deleted, it can be purged, which removes it permanently from the server (see below).
- Export: Clicking “Export” starts the medium export.
Irrevocable deleting media (purge)
By activating the status filter “deleted” all media that have been marked as deleted (and thus aren’t available in the portal anymore) will be listed.
They can be deleted irrevocable (complete deletion from the database and file system) by clicking the “Purge” link in the context menu of the according medium.
You can also delete several or all deleted media by checking the media checkboxes and then executing the according batch action. Note that the batch action “Purge” only works within the filter “deleted” respectively only for media with status “deleted”.
Media Information
Clicking on a thumbnail of a medium or its title opens the media information view.
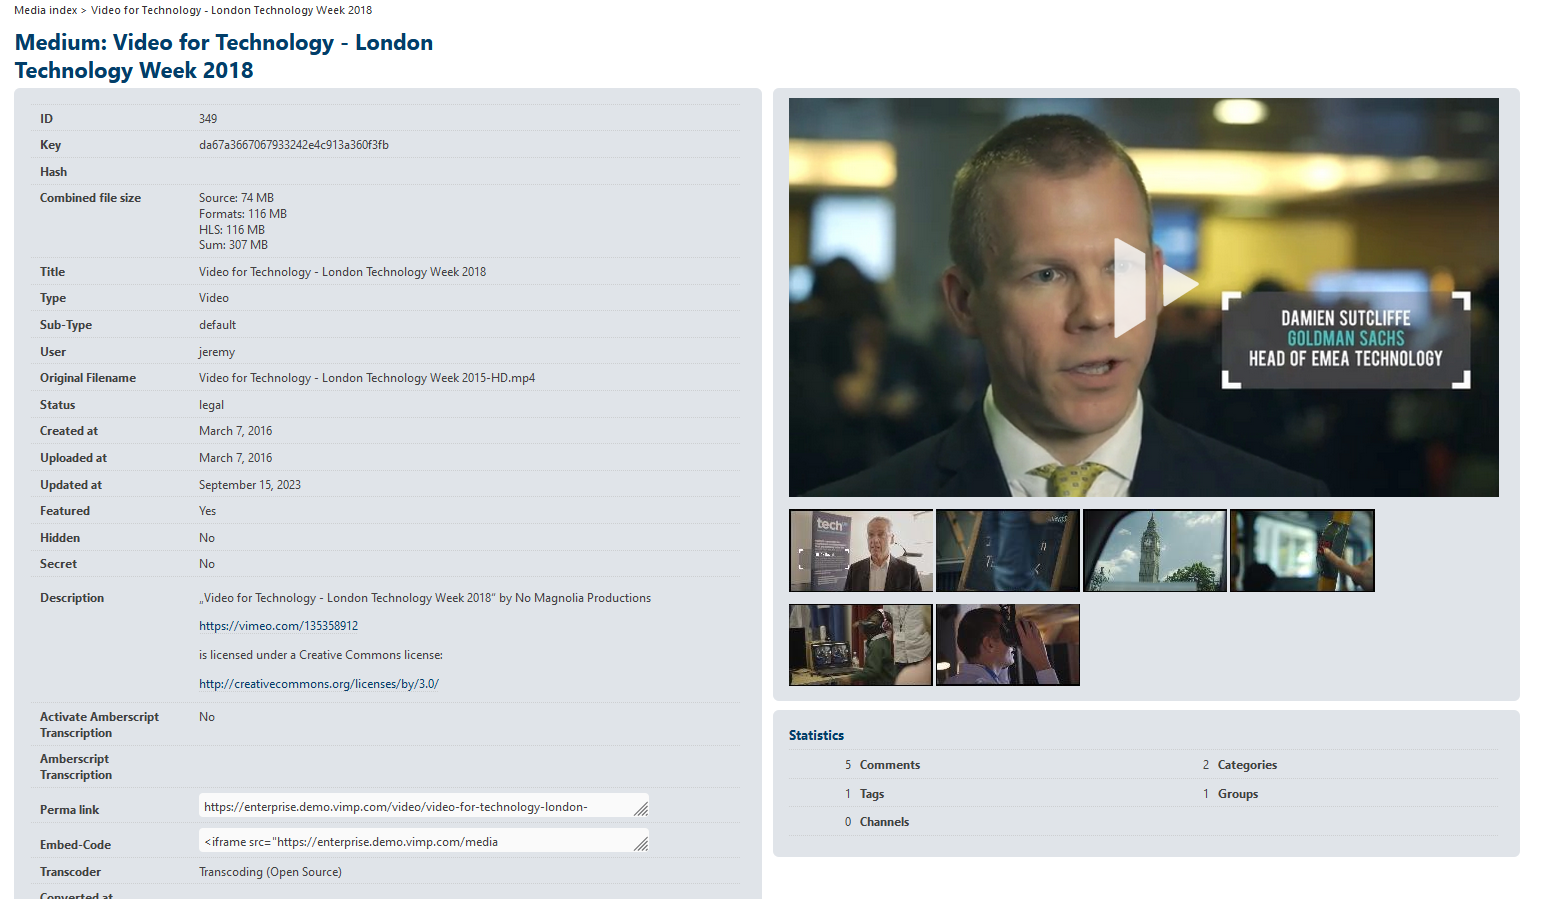
This view displays all information that has been added to the medium as well as a medium preview and some basic statistics.
Clicking the “Edit” button in the lower left corner directly leads to the “Edit media” page.
Editing a medium
In this view all settings of a medium can be modified.
Main information
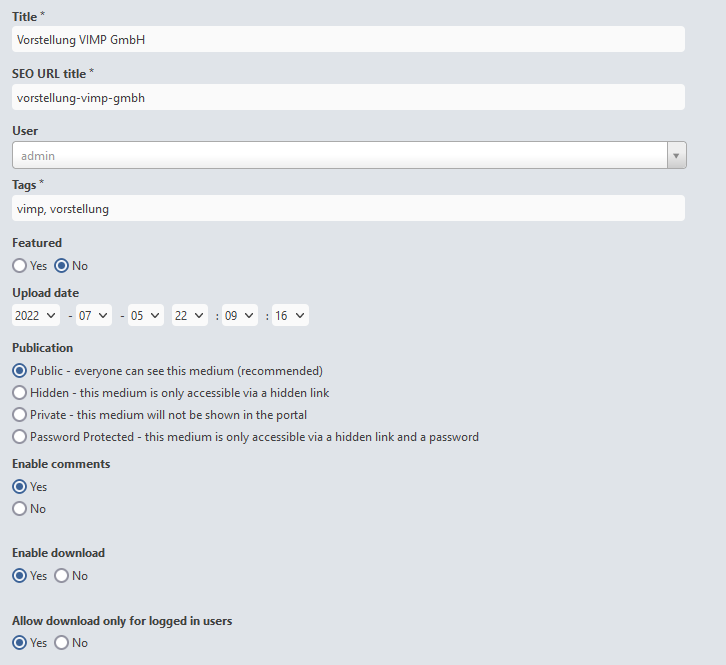
Within the main information fields, you can modify the title of the medium or change the owner (user) of the medium.
Furthermore, you can edit the tags.
The medium can also be defined as a featured medium, you can modify the upload date and set the publication state. Additionally, optional settings for Comments, iTunes U (VIMP Campus only), download and transcoding priority (not available in VIMP Light) can be configured.
Replace media file
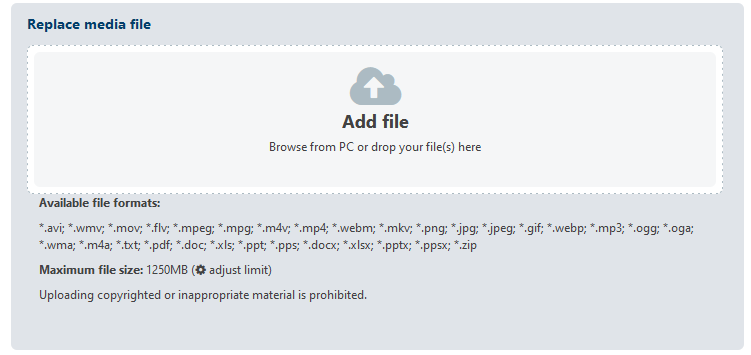
Media files can be replaced optionally (not available in VIMP Light). If activated, you can upload a new media file here that will replace the current one.
After upload, it will be transcoded into the required formats.
Thumbnail
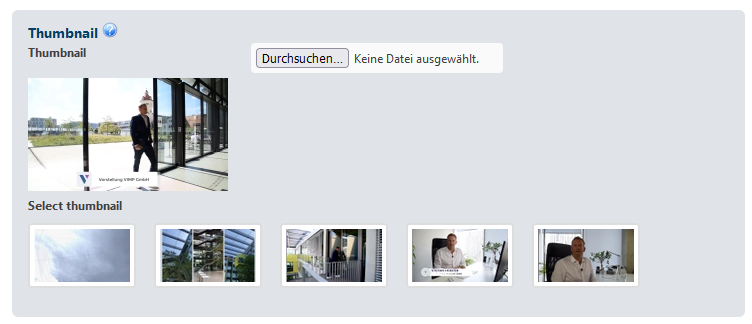
You can also upload a new thumbnail (not available for media type “Image”).
Hit the “Browse” button and select the new image.
Additional files
Each medium can be extended with additional files that will be available for download on the media page.
Description
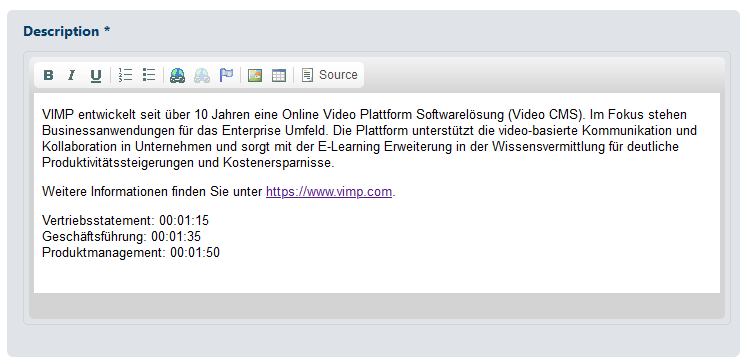
The description entered here is displayed in the media overview of the platform.
General information
This section contains all additional media fields that are defined in the “Media fields” management of VIMP.
Chapters and subtitles
Chapters and subtitles (not available in VIMP Light) can be edited on separate pages. Click the according link to get there. In addition, you have the option to upload alternative audio tracks for audio descriptions.
Categories
Add or remove categories the medium shall be related to.
At least one category has to be selected.
Meta data
Optionally you can enter individual meta data to each medium.
The meta data will not appear in the frontend, but is only visible within the HTML source code and will be available for search engines.
Pricing data
If the Video on Demand module (not available in VIMP Light) is installed and enabled, you can enter a price in credits for the medium.
Media permissions
Each medium can be defined with individual media permissions (VIMP Enterprise and Campus only). This way you can limit access to a medium to certain user roles.
All user roles with the permission “set media permissons” find the same options on the frontend upload page and the media edit page.
Time-controlled publication
Enter a start and/or end date to control the publication timeframe of the medium (VIMP Enterprise and Campus only).
Transcription (not available in VIMP Light)
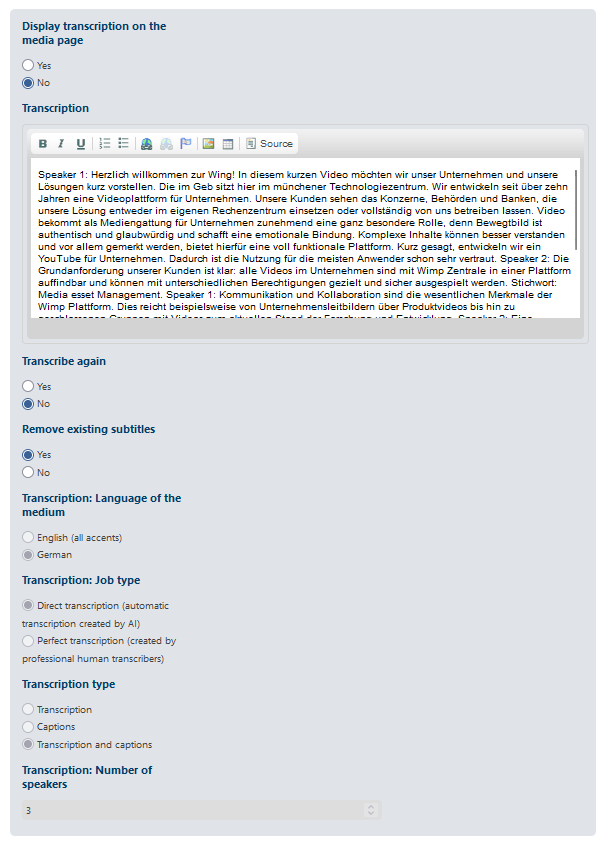
If you have a contract with Amberscript, you can have videos automatically transcribed and subtitled in VIMP.
In the settings, you can choose whether to display the transcription on the media page, you can edit the transcription, and you can have a media re-transcribed.
The following settings are necessary for the transcription:
- Language of the medium
- Job type (automatic or with post-processing)
- Transcription type (transcription, subtitle or both)
- Number of speakers: default 2
Save your changes by clicking the “Save” button or discard them by hitting the “Cancel” button.
Exporting a medium to YouTube (not available in VIMP Light)
Videos can be exported to YouTube optionally. If configured, you can enter the required data into the form and start the export process. Please note that you need to be logged in to your YouTube account in order to start the export.
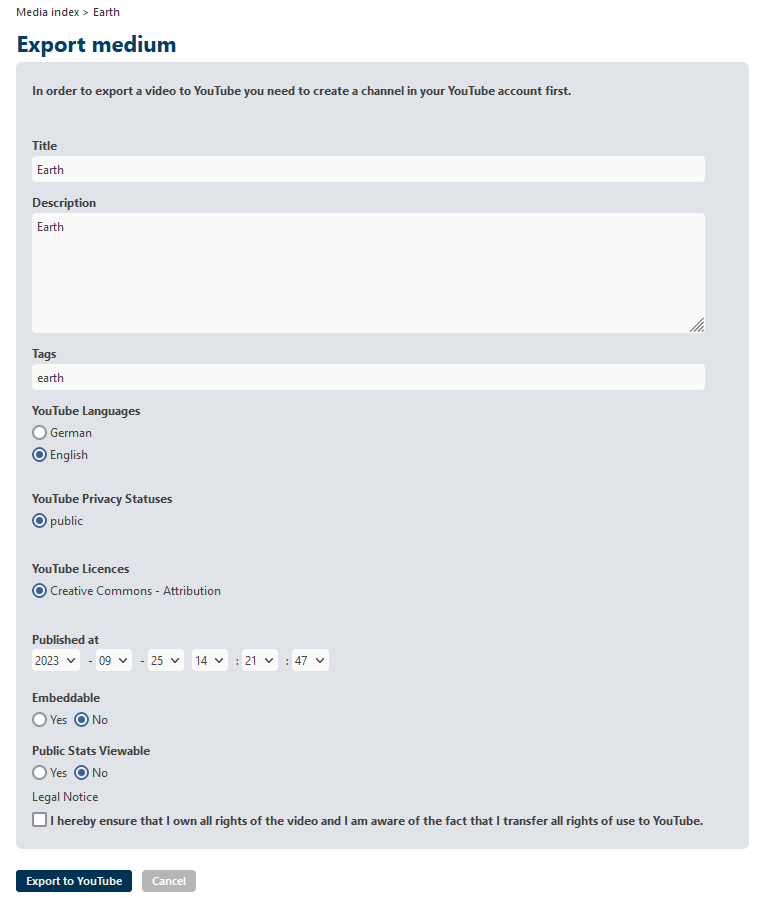
Title, description and tags are filled in automatically and can be edited before submitting the form.
You also have to select a YouTube category, the language of the video, the YouTube privacy status and the YouTube license.
Furthermore, you can define a publish date and configure the embeddability and the view status of stats.
Finally, confirm the legal notice before you submit the form.
Media formats (not available in VIMP Light)
Within the media index there is also the possibility to define special media formats with different resolutions and bitrates.
Uploaded videos will be converted into those formats automatically and visitors of the video platform can select a special resolution within the VIMP player in the frontend.
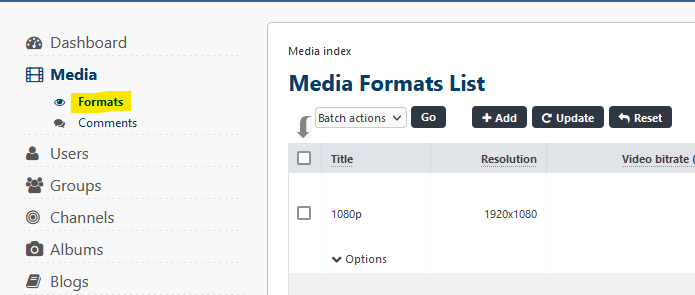
By clicking the “Formats” menu item, the media formats list opens. You can define an unlimited list of formats that uploaded videos will be transcoded to in addition to the default formats that are defined in the VIMP transcoding configuration.
Add new formats by clicking the “Add” button or edit existing ones by clicking the “Edit” link within the context menu of the according format (that appears, if you move our mouse pointer over it).
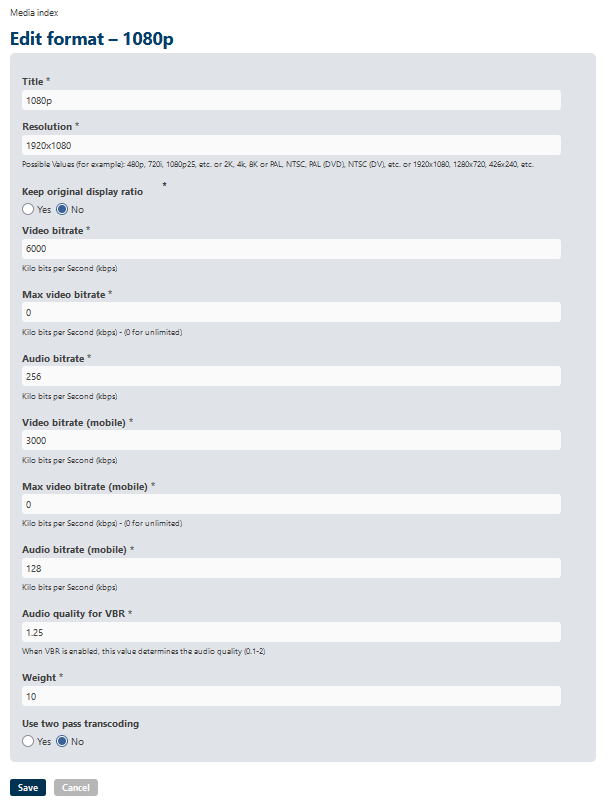
You can enter or modify the following values:
- Title: The title of the format as it will be displayed in the quality selector of the VIMP player.
- Resolution: Enter the resolution of the format here. Legit values (with their corresponding resolutions) are:
| Value | Resolution |
|---|---|
| 4320p | 7680 x 4320 |
| 2304p | 4096 x 2304 |
| 2160p | 3840 x 2160 |
| 2160p | 3840 x 2160 |
| 2160p | 3840 x 2160 |
| 2160p | 3840 x 2160 |
| 2160p | 3840 x 2160 |
| 2160p | 3840 x 2160 |
| 2160p | 3840 x 2160 |
| 2160p | 3840 x 2160 |
| 1152p | 2048 x 1152 |
| 1080p | 1920 x 1080 |
| 720p | 1280 x 720 |
| 576p | 1024 x 576 |
| 540p | 960 x 540 |
| 480p | 854 x 480 |
| 360p | 640 x 360 |
| 240p | 426 x 240 |
| 144p | 256 x 144 |
| 2K | 3840 x 2160 |
| 4K | 3840 x 2160 |
| 8K | 7680 x 4320 |
| PAL | 544 x 576 |
| PAL (DVD) | 704 x 576 |
| PAL (DV) | 720 x 576 |
| NTSC | 544 x 480 |
| NTSC (DVD) | 704 x 480 |
| NTSC (DV) | 720 x 480 |
Or enter any custom resolution that you require, e.g. 1920x960, 1280x800, etc.
- Video bitrate: The bitrate of the format in kbps.
- Audio bitrate: The audio bitrate of the format in kbps.
- Video bitrate (mobile): The bitrate of the format for smartphones in kbps.
- Audio bitrate (mobile): The audio bitrate of the format for smartphones in kbps.
- Weight: This number is used to define the display order of that format in the quality selector.
Save your changes by clicking the “Save” button or discard them by hitting the “Cancel” button.