Creating a new group
Groups can be used as collaboration tools within both an opened or closed area. To create a new group, simply click the create group button within the groups section.

The form offers you to enter a title and a description for your group and optionally allows you to upload two cover pictures of different sizes. The big cover picture spans the complete width of the group page and ideally has a resolution of 1263 x 341px, while the smaller one can be found in the groups overview page and has a resolution of 247 x 180px ideally. If you do not upload the pictures in the correct resolution, the software will crop those images automatically to the correct size. Furthermore, you have to choose the way the content of the group will be published. You can specify that all media within the group shall be available for group members only or alternatively for every registered user. The last specification has to be made with respect to the membership – defining, if a new member has to be confirmed by an administrator or not.
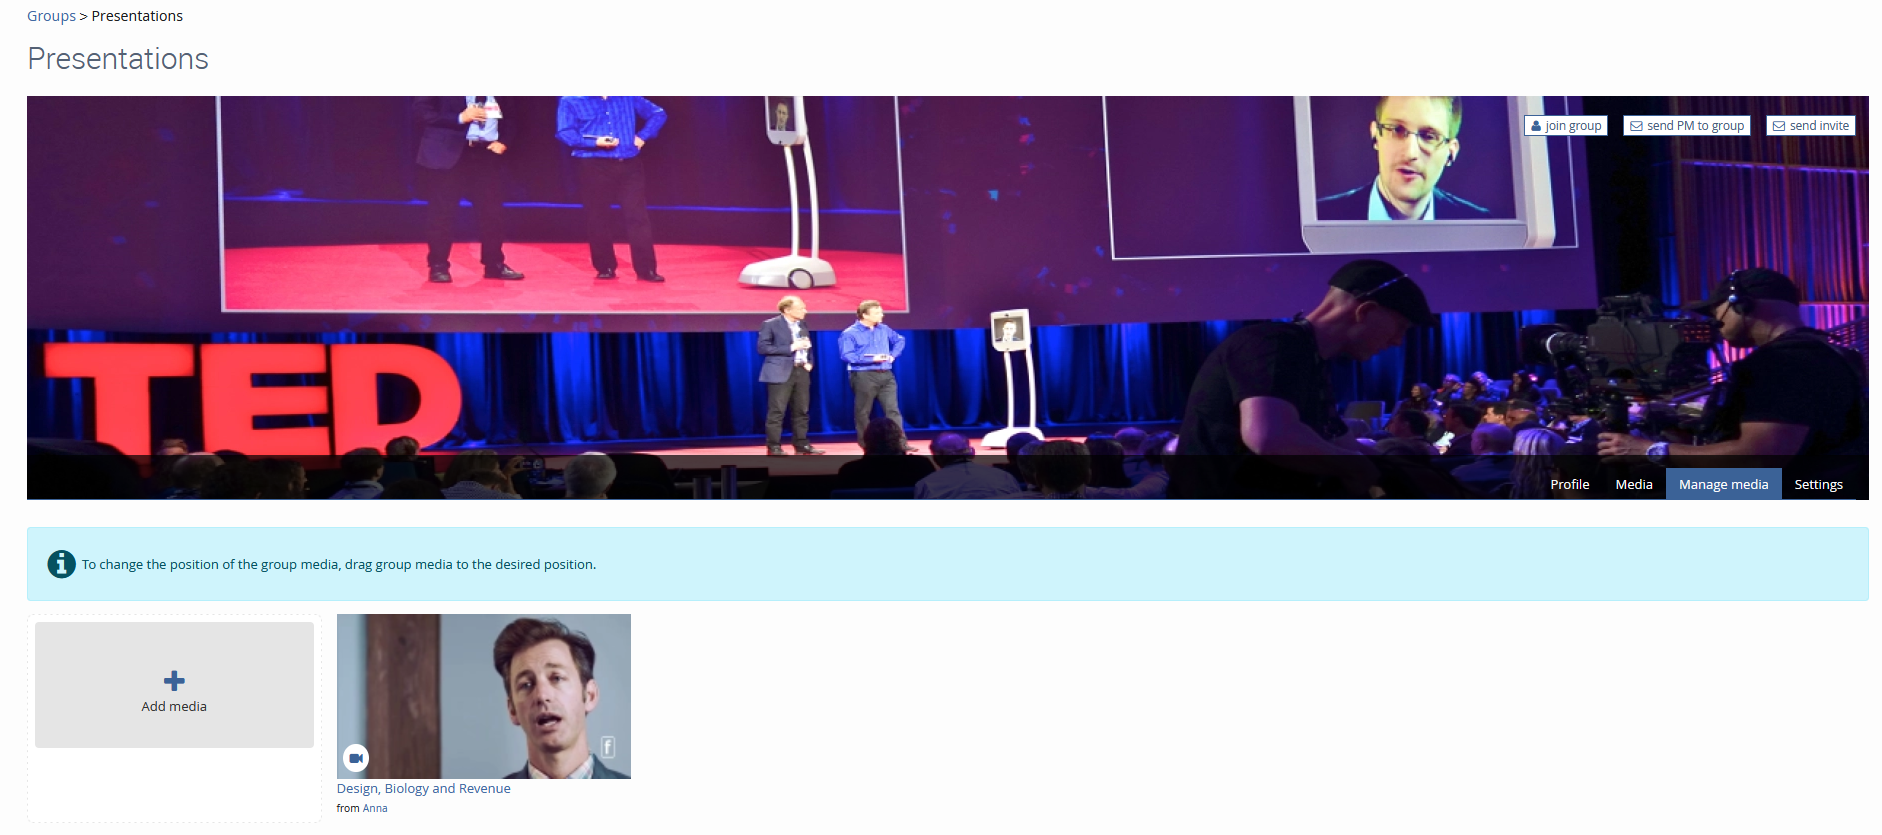
Once the basic information have been provided, you can start adding media to your group. Select the “Manage media” tab and, as you already know from creating an album, click “Add media”:

By clicking „Add media “, a new window (that you also already know from figure 34) will open, showing all media available for adding to your group. To invite registered users to join a specific group, click the button "send invite" at the top right corner of the cover picture. The invited user will get a notification and only needs to click "join group" to see the content of the group.